How to Photograph a Small Apartment So It Looks Bigger
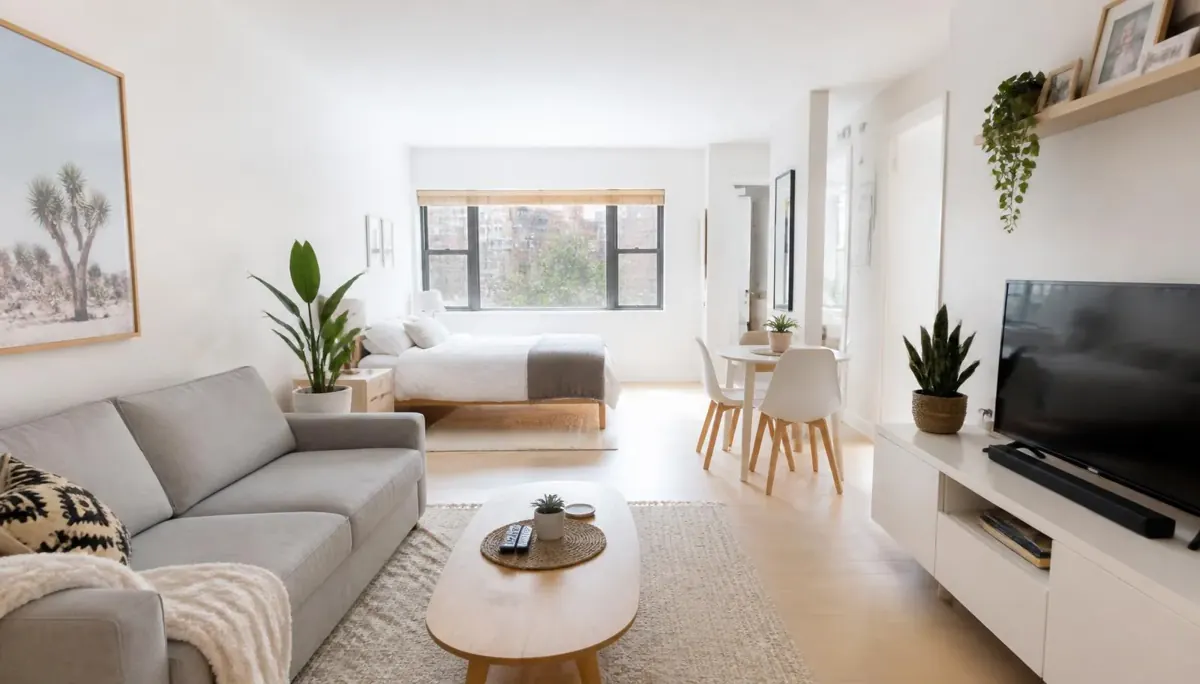
Small apartments lose showings for a reason that has nothing to do with the apartment. A 520 square foot studio shot from the doorway at eye level, with a phone held slightly downward, reads as a hallway with furniture in it. The same studio shot from the correct corner, at chest height, with the vertical lines straight, reads as a home. Nothing was added. The camera simply stopped hiding the space.
This is the sequence to follow when you have twenty minutes and one small unit to cover.
Start by clearing the floor, not the counters
Perceived size comes from visible floor. Buyers read continuous flooring as continuous space, and every object sitting on it interrupts that read. Before you take a single frame, remove floor mats, waste bins, laundry baskets, shoe racks, pet bowls, standing fans, extension cords and anything stored under a table.
Counters matter less than agents assume, because counters are usually in the upper third of the frame where the eye spends less time. Clear them anyway, but clear the floor first if you are short on time.
Pull furniture four to six inches away from walls. It feels wrong in person and it looks right in a photograph: the small gap creates a shadow line that separates the piece from the wall and gives the room depth.
Shoot from the corner, at chest height
Stand in a corner, or as close to one as the layout allows, and frame the two walls that run away from you. Corner angles show two dimensions of a room instead of one flat wall, and that diagonal is what makes a small room read as having depth.
Camera height is the single biggest mistake in agent-shot photos. Eye level, around 5'6", tips the lens downward and fills the bottom of the frame with floor immediately in front of you, which compresses the room. Shoot between 48 and 55 inches — roughly chest height — and keep the camera perfectly level. A cheap tripod with a bubble level pays for itself on the first listing.
Keep vertical lines vertical. Door frames, window frames and wall corners must run straight up and down in the frame. If they lean inward at the top, the camera is tilted up; if they splay outward at the bottom, it is tilted down. Both make a room look like it is collapsing.
Choose the right focal length and stop there
Wide is useful. Too wide is a complaint at the showing.
On a phone, the 0.5x ultra-wide is tempting and usually a mistake in a small apartment: it stretches whatever is near the edges, turning a normal sofa into a nine-foot slab and setting up a disappointment when the buyer walks in. Use the main 1x lens where you can, and step back into a doorway or the adjacent room instead of zooming out.
On a camera, 16-24mm on full frame (10-16mm on crop) is the working range for interiors. Below 16mm, straight walls start curving and the room reads as distorted rather than large.
The honest test: if the photograph makes a buyer expect a room that they cannot find when they arrive, you bought a click and lost a showing.
Balance window light instead of fighting it
Small apartments are often single-aspect, which means one bright window and a dim interior. Expose for the room and the window blows out to white. Expose for the window and the room goes muddy.
Three options, in order of effort:
- Bracket and merge. Take three to five frames at different exposures from a fixed tripod position and combine them so the window view and the interior are both visible. This is the standard approach for a reason.
- Turn every lamp on, plus the overheads. Mixed color temperature is fixable later; dead, shadowed corners are less so.
- Shoot at the right hour. Photograph east-facing rooms in the morning and west-facing rooms in the late afternoon, when the sun is not driving directly through the glass.
Avoid on-camera flash pointed at the room. It flattens everything, throws a hard shadow behind furniture and reveals every texture flaw on the wall.
Give each room one clear job
In a studio or a one-bedroom, buyers are trying to answer a practical question: where does life happen? Compose so each area has an obvious purpose. A made bed with two pillows. A dining table set for two, not six. A desk with a chair pushed in.
Shoot each defined zone from the angle that shows its relationship to the next one. A frame that includes the kitchen edge and the living area together teaches the buyer the layout faster than two separate photos do, and connected space reads as more space.
Include one deliberate detail shot per unit — a window view, a tiled backsplash, built-in storage — but keep the count low. Twelve to eighteen strong photos outperform thirty-five repetitive ones.
Fix the four things that undo everything else
Once the shoot is done, most small-apartment photos need the same handful of corrections:
- Straighten verticals. Even a one-degree lean is visible and makes the room feel unstable.
- Lift the shadows. Dark corners read as smaller rooms. Open them up without flattening contrast to gray.
- Neutralize color casts. Warm bulbs against daylight produce an orange half and a blue half. Correct to a single neutral white so the walls look like one color.
- Recover the window. A blown-out white rectangle removes the outside world. Bringing back even a soft suggestion of the view adds depth the room does not otherwise have.
Check your MLS rules before editing. Most boards allow tonal and color correction and prohibit removing or adding permanent features. Straightening a wall is fine; deleting a radiator is not.
A twenty-minute shot list for a studio
- Entry looking in, from the corner beside the door, chest height.
- Living area from the opposite corner, including the kitchen edge.
- Kitchen straight down the counter run, verticals checked.
- Sleeping area from the foot of the bed, slightly off-center.
- Bathroom from the doorway, mirror angled to avoid your own reflection.
- Window view, exposed for outside.
- One storage feature: closet, built-ins or under-stair space.
Shoot the list in order, check the verticals on each frame before you move, and you will leave with a set that represents the apartment honestly and at its best.
If the editing step is where your evenings disappear, that is the part Quick Listify handles: upload the set, get straightened, balanced, MLS-ready versions back, and keep the twenty minutes you spent shooting as the only time the listing costs you.